
Installing kitchen wall tiles can significantly enhance the aesthetics and functionality of your kitchen. Tiles provide a durable and easy-to-clean surface that withstands the demands of a busy kitchen environment. Here’s a comprehensive step-by-step guide to help you achieve a professional finish when installing kitchen wall tiles. For more inspiration and options, check out kitchen wall tiles from Club Ceramic.
1. Preparing the Kitchen Wall
Remove Existing Wall Coverings
Start by removing any existing wall coverings such as wallpaper or paint. Use a scraper or a steamer to peel away these coverings. Ensure the wall surface is clean and free from debris and dust by brushing and wiping it with a damp cloth.
Inspect for Moisture or Mold
Check the wall for any signs of moisture or mold. Addressing these issues before tiling is crucial to prevent future damage. If you detect moisture or mold, consult a professional to resolve the underlying problem.
Repair Wall Defects
Fill any holes or uneven surfaces with a suitable filler. Ensure the wall is flat, firm, dry, and free from any grit. Use a spirit level to check for bumps and patches, and smooth them out as necessary.
2. Selecting and Measuring Tiles
Choose Your Tiles
Select tiles that complement your kitchen’s design scheme while also being durable and easy to clean. Ceramic and porcelain tiles are popular choices due to their versatility and resilience.
Measure the Area
Measure the height and width of the wall area you plan to tile. Multiply these measurements to calculate the total area in square meters. Add an extra 10% to account for cutting and wastage.
3. Preparing the Adhesive
Mix the Adhesive
Mix tile adhesive according to the manufacturer’s instructions. For ceramic tiles, a ready-mixed adhesive can be used. For porcelain tiles, use a powdered adhesive. Ensure the adhesive is lump-free and has a smooth consistency.
4. Laying Out the Tiles
Dry Fit the Tiles
Lay out your tiles on the floor to plan the pattern and placement. Use tile spacers to maintain uniform spacing between tiles. This step helps you visualize the final layout and make any necessary adjustments before applying adhesive.
Mark the Starting Point
Find the center of the wall and mark a vertical line. This will be your starting point for tiling, ensuring a symmetrical and balanced layout.
5. Applying the Adhesive and Setting Tiles
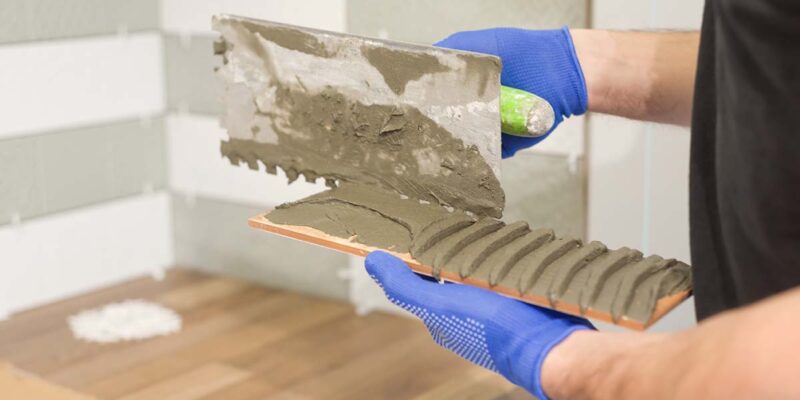
Spread the Adhesive
Using a notched trowel, apply the adhesive evenly onto the wall in small sections. Work from the bottom up and the center out, ensuring full coverage and consistent thickness.
Place the Tiles
Press each tile firmly into the adhesive with a slight twisting motion to ensure optimal contact. Use spacers to maintain uniform gaps between tiles. Occasionally lift a tile to check for good adhesive contact.
Cutting Tiles
For any tiles that need to be cut, use a tile cutter or a wet saw. Measure and mark the tiles accurately before cutting to ensure a precise fit.
6. Grouting the Tiles
Mix the Grout
Mix grout powder with water according to the manufacturer’s instructions until you achieve a smooth, lump-free consistency.
Apply the Grout
Using a grout float, apply the grout diagonally across the tiles, ensuring all joints are filled completely. Work in small sections to prevent the grout from drying too quickly.
Clean Excess Grout
Once the grout begins to set, use a damp sponge to gently wipe away excess grout from the tile surface. Rinse the sponge frequently to prevent smearing.
7. Finishing Touches
Remove Spacers and Clean Tiles
Remove tile spacers 20 to 30 minutes after the adhesive has dried. Clean any remaining adhesive or grout residue from the tile surface.
Seal the Edges
Apply a silicone sealant around the edges, near any appliances or furniture, to prevent water seepage into gaps.
Conclusion
Installing kitchen wall tiles can be a rewarding DIY project that enhances the look and functionality of your kitchen. By following these steps and using the right tools and materials, you can achieve a professional finish. For more ideas and high-quality tiles, consider exploring kitchen wall tiles from Club Ceramic.


Comments